ViewBinding使ってみた
少し前にViewModelとDataBinding、LiveDataを使うことで画面の回転が行われても生成したテキストが消えなくなる処理を実装していたのですが、DataBindingよりもViewBindingの方が使いやすくて簡単だという記事を見つけたので実装方法を紹介しようと思いました。
目次
筆者の環境
PC:Windows10
エミュレータ API:27
IDE:AndroidStudio 4.2.2
使用言語:Kotlin version 1.5.2
サンプルアプリ
今回はViewModelとViewBinding、LiveDataを用いて以下の様なとても簡単なサンプルアプリを作成します。
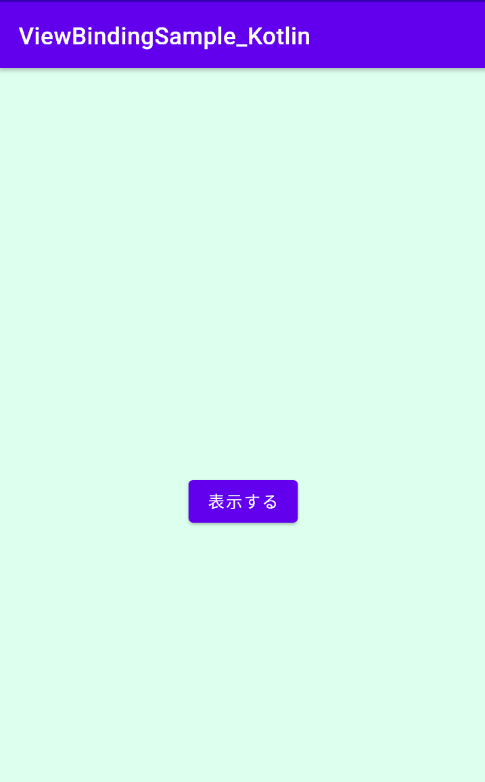
アプリ起動時はただボタンがあるだけ。

ボタンを押すと、Hello_World!!という文字列が画面に表示されるようになる。

勿論、画面を回転させてもHello_World!!という文字列が消えることは無く(リセットされる)、もう一度ボタンをタップする必要もない。
ViewBindingの導入
まずプロジェクトの(:app)に以下のコードを追記して必要な機能を使えるようにします。
android {
・・・
    buildFeatures {
        viewBinding true
    }
・・・
}
dependencies {
    // 今回はViewModelとLiveDataも同時に使うのでここも追記
    implementation 'androidx.lifecycle:lifecycle-livedata-ktx:2.3.1'
    implementation 'androidx.lifecycle:lifecycle-viewmodel-ktx:2.3.1'
}
レイアウトファイル
レイアウトについては詳しく説明する必要もないと思うので。
<?xml version="1.0" encoding="utf-8"?>
<androidx.constraintlayout.widget.ConstraintLayout xmlns:android="http://schemas.android.com/apk/res/android"
    xmlns:app="http://schemas.android.com/apk/res-auto"
    xmlns:tools="http://schemas.android.com/tools"
    android:layout_width="match_parent"
    android:layout_height="match_parent"
    android:background="#dfe"
    tools:context=".MainActivity">

    <TextView
        android:id="@+id/textView"
        android:layout_width="wrap_content"
        android:layout_height="wrap_content"
        android:textSize="30sp"
        app:layout_constraintBottom_toBottomOf="parent"
        app:layout_constraintLeft_toLeftOf="parent"
        app:layout_constraintRight_toRightOf="parent"
        app:layout_constraintTop_toTopOf="parent" />

    <Button
        android:id="@+id/button"
        android:layout_width="wrap_content"
        android:layout_height="wrap_content"
        android:text="表示する"
        android:layout_marginTop="20dp"
        app:layout_constraintEnd_toEndOf="parent"
        app:layout_constraintStart_toStartOf="parent"
        app:layout_constraintTop_toBottomOf="@+id/textView" />

</androidx.constraintlayout.widget.ConstraintLayout>
ViewModel
ViewModel はアクティビティやフラグメントに対するデータ置き場の役割を担います。
また、画面回転やウィンドウのサイズが変更されると、アクティビティやフラグメントインスタンスは再生成されますが、この ViewModel はインスタンスが保持されるという特徴を持っています。
class MyViewModel: ViewModel() {
    private val _hello = MutableLiveData<String>().apply {
        MutableLiveData<String>()
    }

    init {
        _hello.value = ""
    }

    fun setText(){
        _hello.postValue("Hello_World!!")
    }

    fun hello(): MutableLiveData<String>{
        return _hello
    }
}
_hello
_helloはViewModel内部のみで使えるprivateメンバで、後述するsetText()メソッドやhello()メソッドで使われます。
また、最初はinitで空文字によって初期化されています。
setText()
見ての通り、Hello_World!!という文字列をprivateなメンバである_helloメンバに代入しています。
セッターの様な役割を果たしていると思って構いません。
hello()
privateなメンバであるhelloの値を呼び出し元に返す処理です。
所謂、ゲッターです。
MainActivity
ここでようやく、今回のテーマであるViewBindingをふんだんに使っていきます。
class MainActivity : AppCompatActivity() {
    private val myViewModel: MyViewModel by lazy {
        ViewModelProvider(this).get(MyViewModel::class.java)
    }
    private lateinit var binding: ActivityMainBinding

    override fun onCreate(savedInstanceState: Bundle?) {
        super.onCreate(savedInstanceState)

        binding = ActivityMainBinding.inflate(layoutInflater).apply {
            setContentView(this.root)
        }

        myViewModel.hello().observe(this, {
            binding.textView.text = myViewModel.hello().value
        })

        binding.button.setOnClickListener {
            myViewModel.setText()
        }
    }
}
myViewModel
ViewModelのインスタンスを取得している処理と思ってもらえれば大丈夫です。
onCreate以降ではこのインスタンスからViewModel内に定義したメソッドやメンバに対してアクセスできます。
binding
ここが今回のテーマであるViewBindingのメンバになるのですが、戻り値がActivityMainBindingとなっています。
今回はActivityでBindingを定義しているのでActivityMainBindingですが、もしこれがSubActivityで定義される場合にはSubActivityBindingという戻り値になるため注意が必要です。
またViewBindingを使うまでonCreateで記述されていたsetContentView(R.layout.activity_main)という処理は不要になり、代わりに
binding = ActivityMainBinding.inflate(layoutInflater).apply {
    setContentView(this.root)
}
という処理になります。
ViewBindingを用いると、今まで記述していたfindViewByIdといった記述が不要になり、「binding.ViewのID名」になることが最大のメリットです!
observe
observe・・・つまり監視する処理です。
ViewModelで定義した_helloメンバの値がsetText()によって更新され、hello()の戻り値が更新されるとその更新された値をレイアウトファイルで設定したTextViewに対してセットします。
まとめ
どうでしたか?
DataBindingと比べるとかなり容易に実装出来たのではないでしょうか?
実は更にMainActivityに記述する処理が減らすことができて、個人開発ならともかく複数人で開発しているアプリ等なら更に利便性が向上するライブラリもあったりするのですが、それはまた今度…。